Ecoological - Truck Aftermarket Accessories
  • Home
  • Products
    • GapShield
    • AeroBox
    • BumperShellz
  • SALE ITEMS
  • 2022+ Tundra BumperShellz
  • New Model Request
  • Become A Retailer
  • Contact Us
  • Manufacturing
  • About Us
  • Videos
  • Toyota Color Match Wait list
  • Installation Instructions Home
    • FORD MODEL YEAR SELECT >
      • 2015-2017 Ford F-150 Installation Instructions Home
      • 2018-2020 Ford F-150 Installation Instructions Home
      • 2017-2019 Ford F-250 Installation Instructions Home
    • CHEVROLET MODEL YEAR SELECT >
      • 2007-2013 Silverado Installation Home
      • 2014-2015 Silverado Installation Home
      • 2016-2018 Silverado Installation Instructions Home
      • 2019-2022 Installation Home >
        • 2019-2021 Front Bumper Installation Home
    • GMC MODEL YEAR SELECT >
      • 2007-2013 GMC Sierra Installations Home
      • 2014-2015 Sierra Installation Home
    • 2016-2018 Sierra Installation Home
    • RAM MODEL YEAR SELECT >
      • 2009-2012 RAM Installation Configuration
      • 2013-2018 RAM Installation Configuration
    • TOYOTA MODEL YEAR SELECT >
      • Tundra Installation Configuration >
        • Tundra Installation Version Selector Page
  • AeroBox Version Installation Selector
  • AeroBox Waitlist
  • Barcelona Red Sign-Up

2014-2022
4Runner
​
 Shellz™ Grille Garnish and Grille Bars Installation Guide

​Predicted Installation Time: 10-20 minutes
INSTRUCTIONAL COMPANION VIDEO
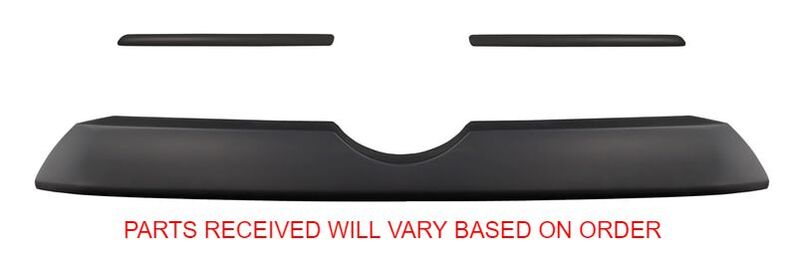
Items Included

  • Center Grille Garnish (and/or) Grille Bars
  • Adhesion Promoter Packet

Tools Required

• Isopropyl Alcohol/clean rags
​
Picture

Before You Get Started...

Picture
Warm surfaces and 3M tape with heat gun if ambient temperature is below 68 degrees F
Picture
Any Modification or unintended use will void the manufacturers warranty
Picture
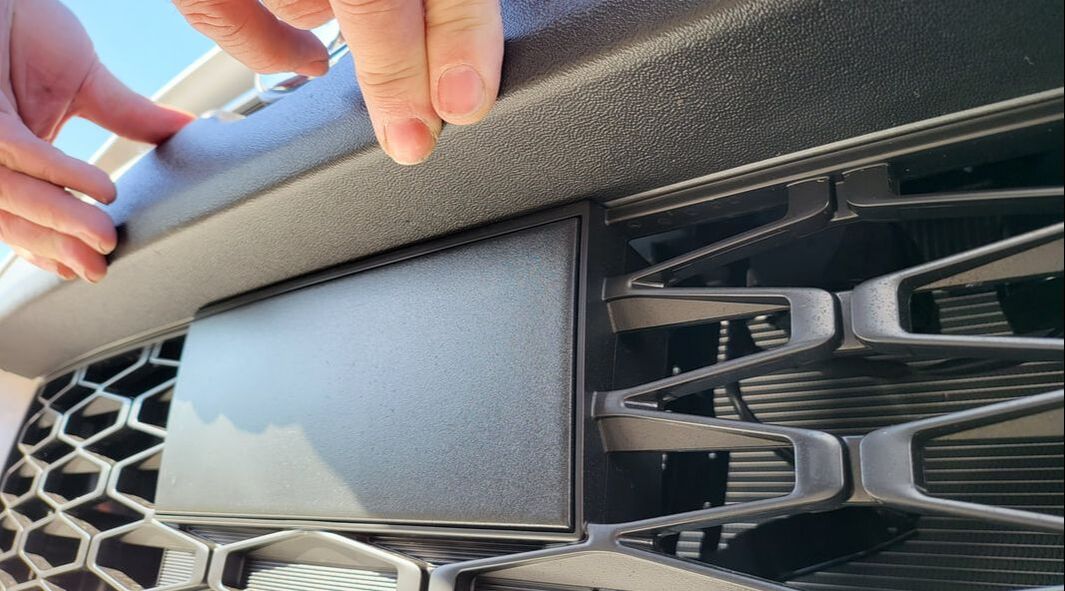
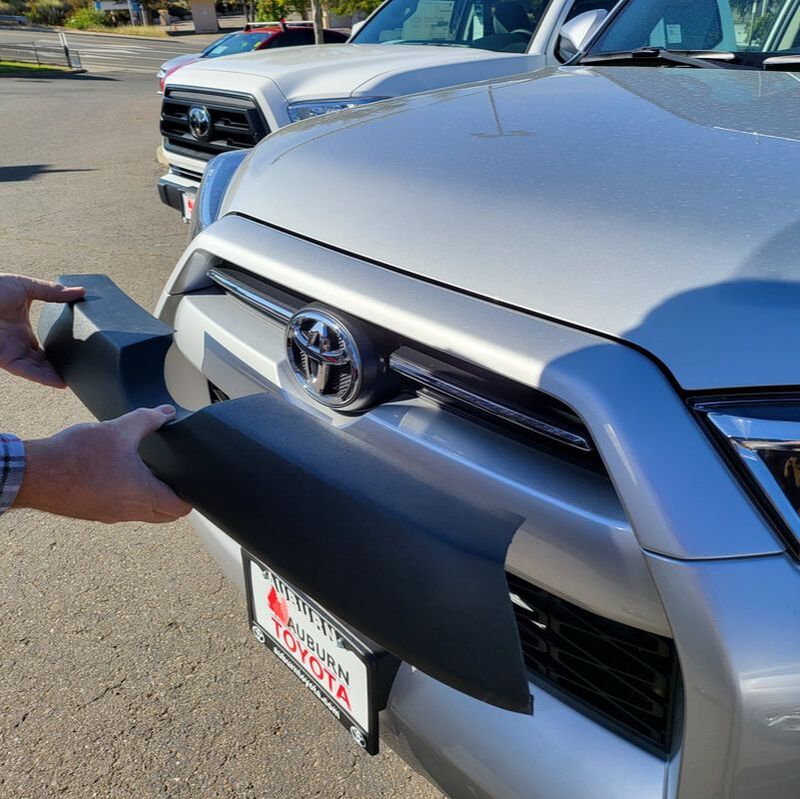
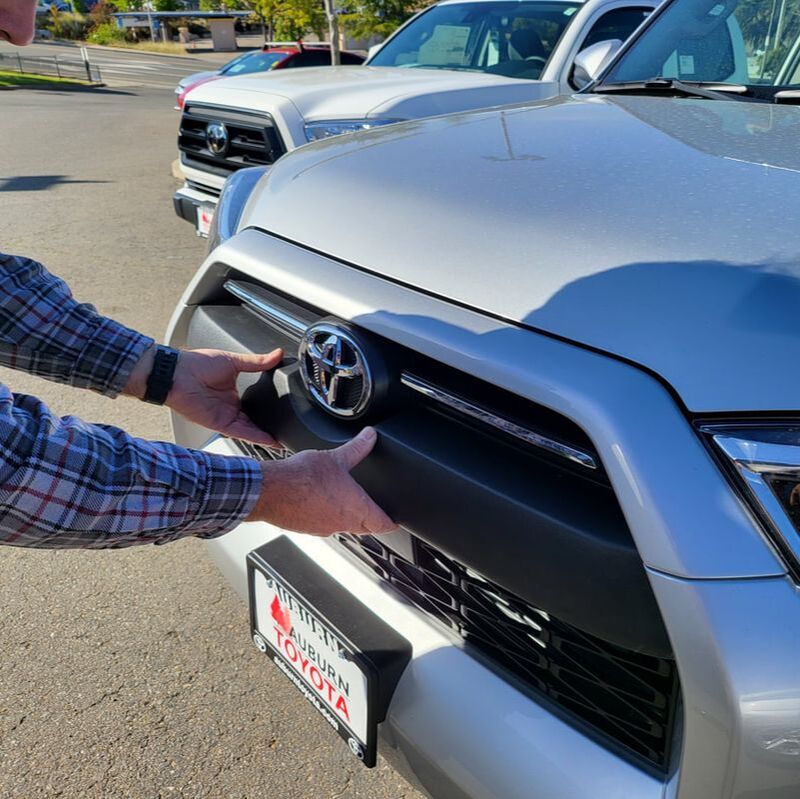
A dry fit of all pieces must be performed before the final installation of the product to ensure fit
Picture
Products cannot be returned for a full refund after the red backing to the 3M tape is removed

The degree to which you follow these preparation instructions will determine the quality of the installed product.  Please follow all instructions and be patient.  If you are unsure of any area of the installation after reading these instructions, please call us at 844-918-3688, and we will answer any questions that you have.

Installation

NOTE: We recommend Dry-Fitting all BumperShellz pieces to their specific locations BEFORE removing ANY of the red backing strips from the tape. Make sure all pieces are correct, i.e., you have received all pieces shown above, with or without sensor holes and/or fog lamp openings, color/pattern is correct, and that all are undamaged. There should not be any (or extremely minimal) bumper surface visible once flanges are slid under trim and sensor holes (if present) are centered over sensor trim. Dry Fitting is also good practice for lining up each piece and guiding it into place, visualizing how to do it when the backing strips are removed and the tape is STICKY. Note that once the backing is removed we cannot give full credit for return.

Grille Garnish Installation

1. Clean the surface thoroughly with Isopropyl Alcohol, and apply Adhesion Promoter on areas of the grille bar where the 3M tape will be touching down. (wipe adhesion promoter on the grille bars at this time if you are installing those as well.)
2. Remove backing to the 3M tape.
3. Slip Grille Garnish over top of the OEM Grille Bar.
Picture
Picture
​

4. Tuck the top of the garnish underneath the bottom edge of the upper grille.
Picture
Picture
5. Tuck the lower edge of the garnish in above the sensor on the underside of the grille.
Picture
6. Put firm pressure on the surface of the garnish where the 3M tape is applied to make the adhesion permanent.

Upper Grille Bars Installation

1. If not already done, clean the surface thoroughly with Isopropyl Alcohol, and apply Adhesion Promoter.
2. Remove backing to the 3M tape.
3. Apply grille bars overlays directly over top of the grille bars. (be sure you are applying each piece to its corresponding side.
4. Put firm pressure on the grille bar overlays to permanently adhere them to the surface.
NOTE for Maximum Adhesion: The acrylic foam tape used to adhere your BumperShellz is “pressure sensitive”, so making sure there is sufficient pressure applied to each of the taped areas is vital to achieve optimum adhesion of your BumperShellz™ to your bumper.  It is also recommended that you come back a few hours later, or the next day, to give each BumperShellz piece another pressure rub to ensure the best adhesion. Allow the tape adhesive to set up for at least 24 hours before washing your truck. Maximum adhesion is reached after 3-5 days in temperatures above 70 degrees, longer if it is cooler. Once the adhesive has fully bonded to a properly prepared bumper surface, it is nearly impossible to remove the BumperShellz without damaging them. Please refer to “removal instructions” in the BumperShellz FAQ section on the website, should removal be necessary. 

Care for your BumperShellz™

Care for your BumperShellz™ like you would any fine paint finish.   Use high quality cleaning products designed specifically for car care.

Gloss finishes: Oftentimes, minor scratches can be buffed out on the gloss finishes.  Rubbing compounds can be used with a mechanical buffer, for deeper scratches.
​
Matte finishes are much more susceptible to abrasions, leaving a "glossy sheen" on the finish, which are generally permanent.  Do not attempt to buff out scratches/abrasions on your matte finish, as this will generally make the damage worse.  Avoid excessive friction when trying to remove anything stuck to the matte finish surface and keep cleaning rags/water clean and abrasive free.  Abrasive brush-type car washes are not recommended, as they can abrade the Matte finish.  Brushless car washes are acceptable.

    Show off your truck, WIN a GAPSHIELD

    Send us your Before and After Pictures!  We will show off your truck to the world.  Plus, one winner will be randomly selected each month to receive a free GapShield!  If you'd like us to tag you on Instagram, please include your profile name.
    Max file size: 20MB
    Max file size: 20MB
Submit

Contact Us

Contact Ecoological

Support

Shipping Information
Privacy Policy
Warranty & Return Policy
Terms & Conditions
​© 2023 Ecoological. All rights reserved.

3860 Cincinnati Ave 
Rocklin , CA 95765
  • Home
  • Products
    • GapShield
    • AeroBox
    • BumperShellz
  • SALE ITEMS
  • 2022+ Tundra BumperShellz
  • New Model Request
  • Become A Retailer
  • Contact Us
  • Manufacturing
  • About Us
  • Videos
  • Toyota Color Match Wait list
  • Installation Instructions Home
    • FORD MODEL YEAR SELECT >
      • 2015-2017 Ford F-150 Installation Instructions Home
      • 2018-2020 Ford F-150 Installation Instructions Home
      • 2017-2019 Ford F-250 Installation Instructions Home
    • CHEVROLET MODEL YEAR SELECT >
      • 2007-2013 Silverado Installation Home
      • 2014-2015 Silverado Installation Home
      • 2016-2018 Silverado Installation Instructions Home
      • 2019-2022 Installation Home >
        • 2019-2021 Front Bumper Installation Home
    • GMC MODEL YEAR SELECT >
      • 2007-2013 GMC Sierra Installations Home
      • 2014-2015 Sierra Installation Home
    • 2016-2018 Sierra Installation Home
    • RAM MODEL YEAR SELECT >
      • 2009-2012 RAM Installation Configuration
      • 2013-2018 RAM Installation Configuration
    • TOYOTA MODEL YEAR SELECT >
      • Tundra Installation Configuration >
        • Tundra Installation Version Selector Page
  • AeroBox Version Installation Selector
  • AeroBox Waitlist
  • Barcelona Red Sign-Up