Tools Required
•Wire Splicing Tools
•Voltmeter
•Voltmeter
Before You Get Started...

Read all instructions before attempting wiring
|

Consult local technician if you are uncertain about wiring your lightbar to your vehicle
|

Lighting law vary by jurisdiction. Check local laws before installing
|
In order to facilitate DIY wiring of the light bar to your vehicle, these instructions are provided as general guidance. Ecoological is not responsible for any actions taken to install this light bar wether suggested here or otherwise. Please consult a qualified technician if uncomfortable completing the wiring yourself. These instructions are for splicing into existing wire harness. On some Ford models, alternative 4-pin connectors cannot be added for plug-n-play, as they may interfere with the vehicle’s back-up/towing sensor electronics
INSTALLATION
We have partnered with the manufacturer of this light bar (Oracle Lighting) to provide you with these instructions. If you have any specific questions not covered in these instructions, additional information is available on the Oracle Website (www.oraclelights.com) or general wiring procedures, including videos for auxiliary vehicle lighting.
1. By this time in the assembly, it is assumed that the end of the wire bundle from the lightbar has been routed through the emblem opening (emblem removed) at the center of the tailgate, down through the tailgate and out the opening at the bottom.
Note: If a wire harness conduit from the tailgate through the bed panel is present, it is preferable to bridge the gap between the tailgate and the bed panel inside this conduit, if possible, for additional protection of the wires.
Note: If a wire harness conduit from the tailgate through the bed panel is present, it is preferable to bridge the gap between the tailgate and the bed panel inside this conduit, if possible, for additional protection of the wires.
|
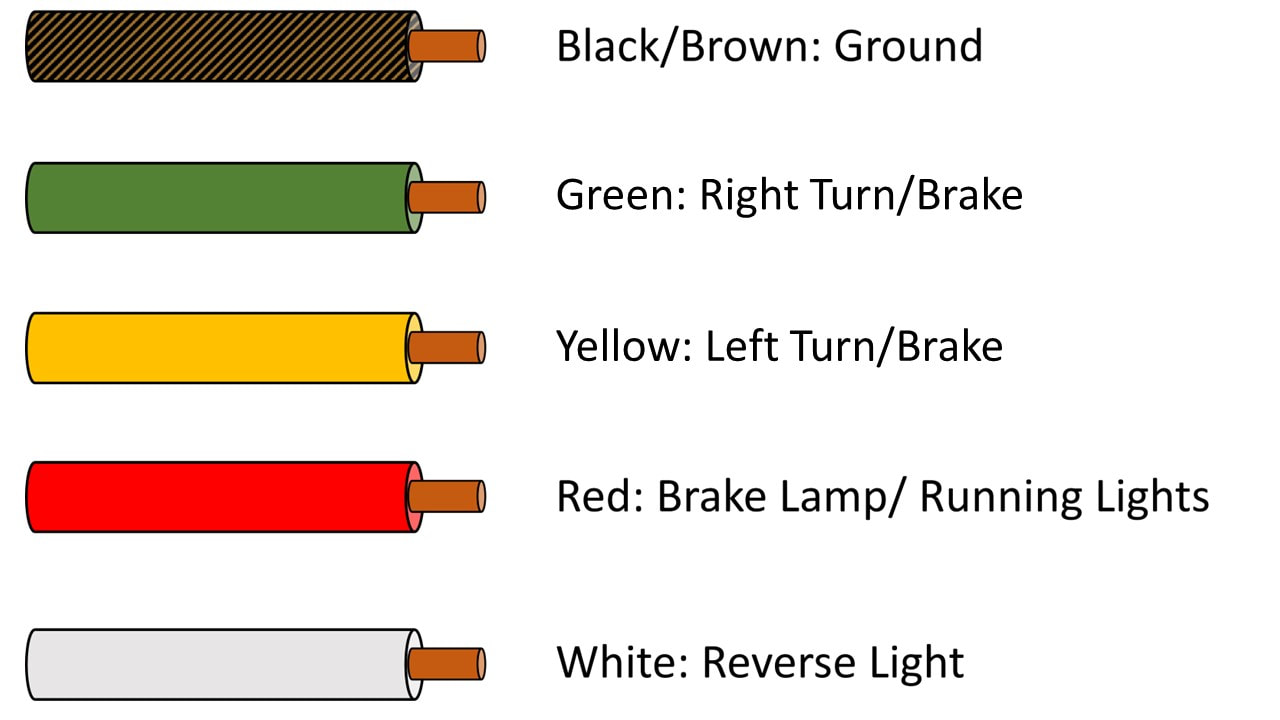
2. In order to facilitate wiring of the lightbar to a variety of truck models, the length of wire has been extended to 8 feet. The color/function of the wire extensions are designated as shown and can be verified by touching the ground to ground on a 12 V source and individually contacting each color wire to the positive terminal and observing the function.
|
|
|
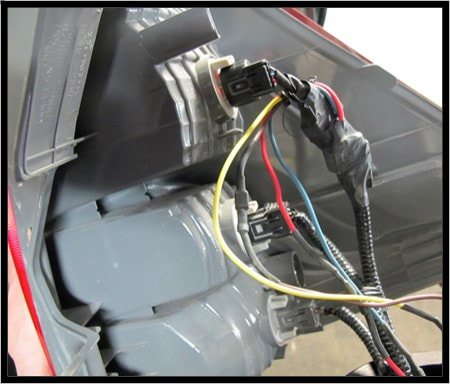
3. The correct wire from the vehicle for each specific function can be identified by either consulting the vehicle’s wiring diagram or by testing the vehicle’s wires with a voltmeter. Wires can be accessed by removing each respective taillight assembly or at any point of the wire harness leading up to the taillamps from underneath the truck bed. To do so, turn on the specific function, and identify which wire energizes. For example, turn on your left turn signal, identify the wire with a voltmeter that energizes to approximately 12-13 volts. Be especially careful when checking for the reverse lamp wire, as this will require putting the vehicle in reverse. Make sure the brakes are applied fully. These steps are much easier and safer to accomplish with a helper.
|
|
4. Once the appropriate wires are identified, the associated wire from the light bar can be spliced to the vehicle wire by various means, including: snap lock low voltage wire splicers or by soldering and shrink wrapping the joint.
Note: It may be necessary to separate the associated wire from the light bar wire bundle in order to reach the desired splicing location.
Note: It may be necessary to separate the associated wire from the light bar wire bundle in order to reach the desired splicing location.
5. Check the function of the light bar after each wire is spliced to assure continuity.
6. Once all wires are correctly spliced together, tuck the wires up under the bed and secure them with wire ties to protect them.