Ecoological - Truck Aftermarket Accessories
  • Home
  • Products
    • GapShield
    • AeroBox
    • BumperShellz
  • SALE ITEMS
  • New Model Request
    • 2024+F150 Early Interest Form
  • Become A Dealer
  • Contact Us
  • Installation Instructions Home
    • FORD MODEL YEAR SELECT
    • CHEVROLET MODEL YEAR SELECT >
      • 2007-2013 Silverado Installation Home
      • 2014-2015 Silverado Installation Home
      • 2016-2018 Silverado Installation Instructions Home
      • 2019-2021 Installation Home >
        • 2019-2021 Front Bumper Installation Home
      • 2023-2024 Installation Home >
        • 2023-2024 Front Bumper Installation Home
        • 2023-2024 Silverado Grille Installation Home
    • GMC MODEL YEAR SELECT >
      • 2007-2013 GMC Sierra Installations Home
      • 2014-2015 Sierra Installation Home
      • 2016-2018 Sierra Installation Home
      • 2019-2024 Sierra Installation Home
    • RAM MODEL YEAR SELECT >
      • 2009-2012 RAM Installation Configuration
      • 2013-2018 RAM Installation Configuration
    • TOYOTA MODEL YEAR SELECT >
      • Tundra Installation Configuration >
        • Tundra Installation Version Selector Page
  • Acrylic vs. Painted-to-Order
  • Painted Parts Policy
  • Paintable ABS Disclaimer
  • Toyota Tacoma New Product
  • Product Overview

Paint Prep/Sanding Instructions E2

Suggested Tools for Preparation

• Wax and Grease Remover
• Clean "Lint-Free" cloths
• Mild-Detergent
• Wet/Dry Sand paper - 400, 1000-2500 grits
• Grey Scotch Pad
• Sanding Block (preferably a flexible pad)​

Attention

Your paintable BumperShellz™ are made by vacuum forming an extruded High-Impact ABS plastic sheet to the shape of your specific bumper.  Since the paintable sheet is “unfinished” and vacuum forming uses a single sided tool, which is open to the manufacturing plant environment during the forming process, there is a chance some very minor imperfections may be present on the unfinished surface.  Most body/paint shops are experienced with painting ABS plastics.  These instructions are for general information if you will be painting your BumperShellz™ yourself.  If hiring a body/paint shop to do the work, they should follow their own best practices for painting ABS and are responsible for their work.

Preparation

  • If there are any imperfections/scratches on the surface of the BumperShellz™ to be painted, lightly sand them out with 400 grit sandpaper to achieve the desired smoothness.  
  • Use a grey scotch pad to prepare for primer.
  • Use a panel wipe or similar to clean the surface.

Painting
​*these are suggestions, and we cannot guarantee results

​
  • Use a plastic adhesion promoter and 2K high build primer for the best paint adhesion.
  • Typically apply 2-3 layers of base color followed by a wet color sanding with 1000-2500 grit sandpaper.
  • Clean the surface with isopropyl alcohol.
  • Apply 2 layers of clear coat.
  • Wet color sand again with 1500-2500 grit sandpaper.
  • Polish with an appropriate buffing compound to achieve a smooth/glossy finish.
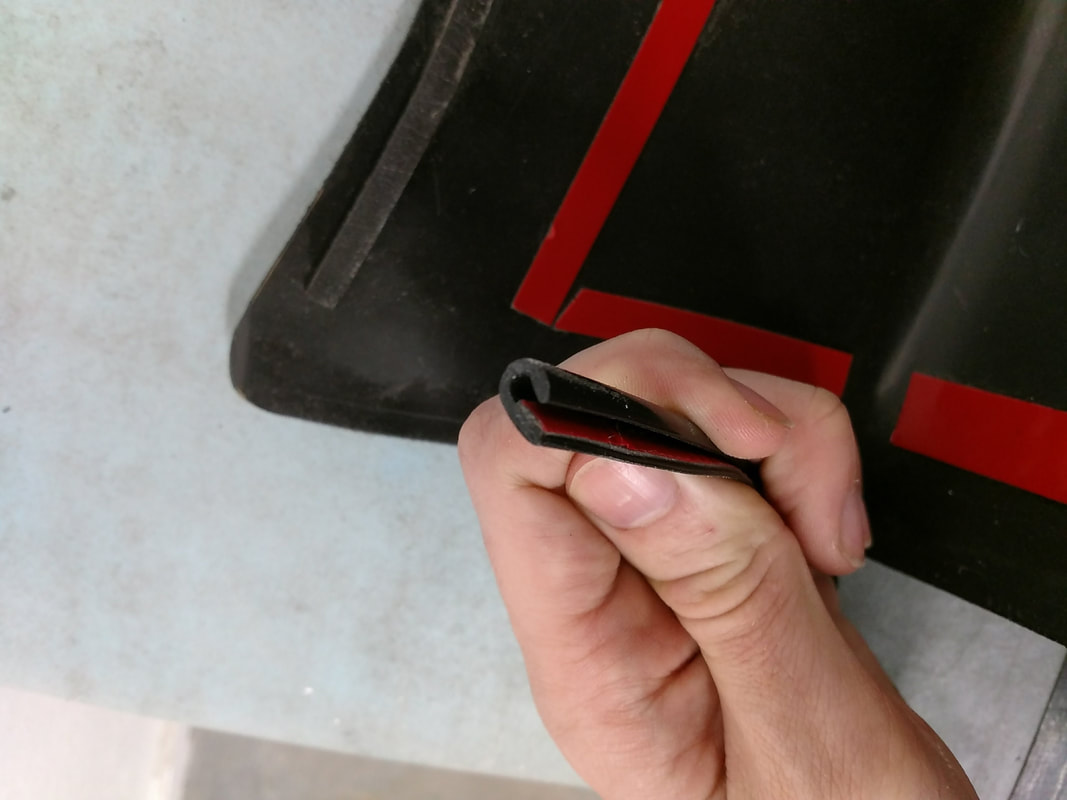
Installing Edging

​Step 1: Peel back a small section of the red backing of the tape to expose the adhesive. 
Picture
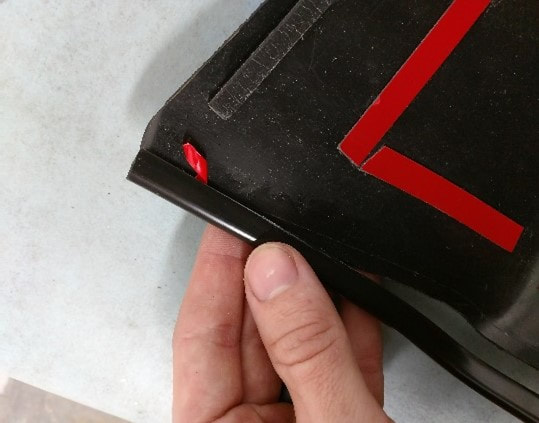
Step 2: Install the trim with the red backing to the tape still intact except for the small section you have peeled back. The side of the “U” trim without the adhesive should wrap around to the painted surface.
Picture
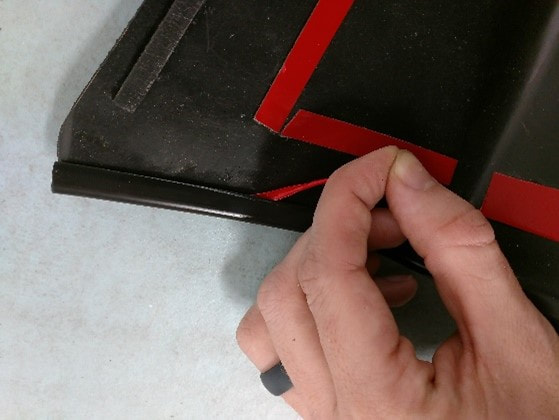
​Step 3: After the inside edge of the trim is lined up with the provided scribe line, peel off the rest of the red backing by pulling down and away from the edging
Picture

    Show off your truck, WIN a GAPSHIELD

    Send us your Before and After Pictures!  We will show off your truck to the world.  Plus, one winner will be randomly selected each month to receive a free GapShield!  If you'd like us to tag you on Instagram, please include your profile name.
    Max file size: 20MB
    Max file size: 20MB
Submit

Contact Us

Contact Ecoological

Support

Shipping Information
Privacy Policy
Warranty & Return Policy
Terms & Conditions
​© 2025 Ecoological. All rights reserved.

3860 Cincinnati Ave 
Rocklin , CA 95765
  • Home
  • Products
    • GapShield
    • AeroBox
    • BumperShellz
  • SALE ITEMS
  • New Model Request
    • 2024+F150 Early Interest Form
  • Become A Dealer
  • Contact Us
  • Installation Instructions Home
    • FORD MODEL YEAR SELECT
    • CHEVROLET MODEL YEAR SELECT >
      • 2007-2013 Silverado Installation Home
      • 2014-2015 Silverado Installation Home
      • 2016-2018 Silverado Installation Instructions Home
      • 2019-2021 Installation Home >
        • 2019-2021 Front Bumper Installation Home
      • 2023-2024 Installation Home >
        • 2023-2024 Front Bumper Installation Home
        • 2023-2024 Silverado Grille Installation Home
    • GMC MODEL YEAR SELECT >
      • 2007-2013 GMC Sierra Installations Home
      • 2014-2015 Sierra Installation Home
      • 2016-2018 Sierra Installation Home
      • 2019-2024 Sierra Installation Home
    • RAM MODEL YEAR SELECT >
      • 2009-2012 RAM Installation Configuration
      • 2013-2018 RAM Installation Configuration
    • TOYOTA MODEL YEAR SELECT >
      • Tundra Installation Configuration >
        • Tundra Installation Version Selector Page
  • Acrylic vs. Painted-to-Order
  • Painted Parts Policy
  • Paintable ABS Disclaimer
  • Toyota Tacoma New Product
  • Product Overview