Items Included
|
Tools Required
|
Before You Get Started...

Warm surfaces and 3M tape with heat gun if ambient temperature is below 68 degrees F
|

Any Modification or unintended use will void the manufacturers warranty
|

A dry fit of all pieces must be performed before the final installation of the product to ensure fit
|

Products cannot be returned for a full refund after the red backing to the 3M tape is removed
|
Getting Started
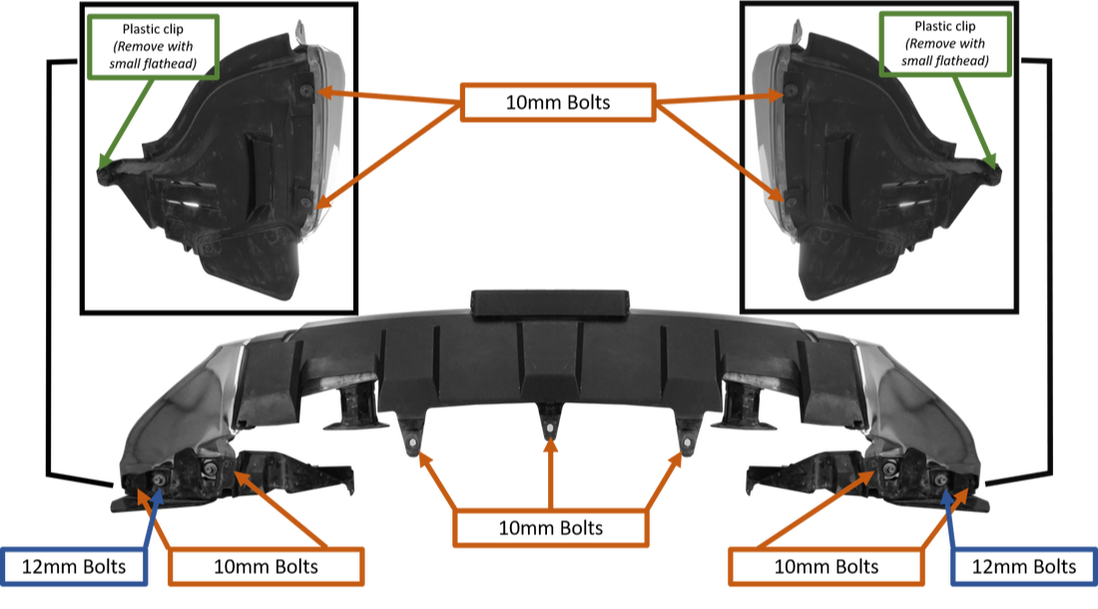
1. Remove fender, and lower trim screws and bolts in specified areas.
2. Remove fender liner.
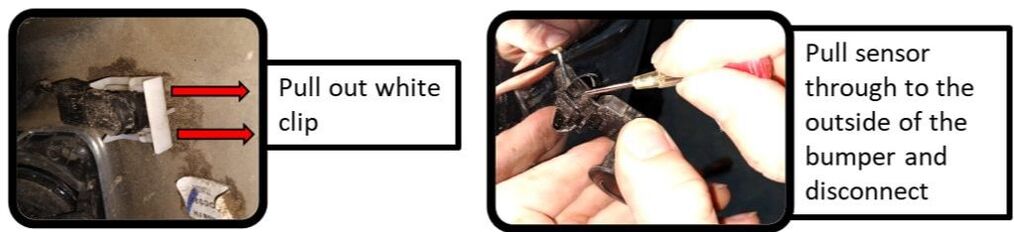
3. FOR BUMPERS WITH PARKING SENSORS
If applicable, remove the parking sensors by first extracting the white spring clip, and then disconnecting, and extracting the black sensor from the bumper through the front side.
If applicable, remove the parking sensors by first extracting the white spring clip, and then disconnecting, and extracting the black sensor from the bumper through the front side.
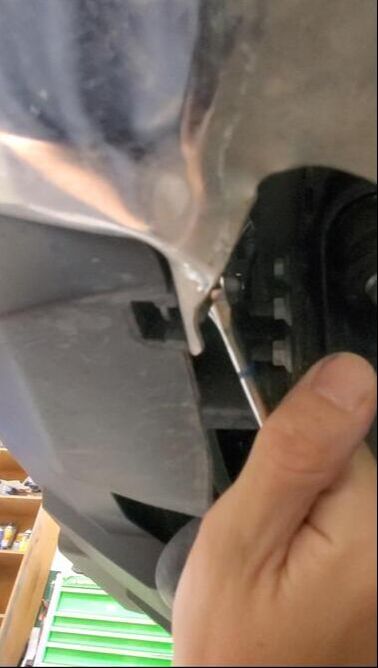
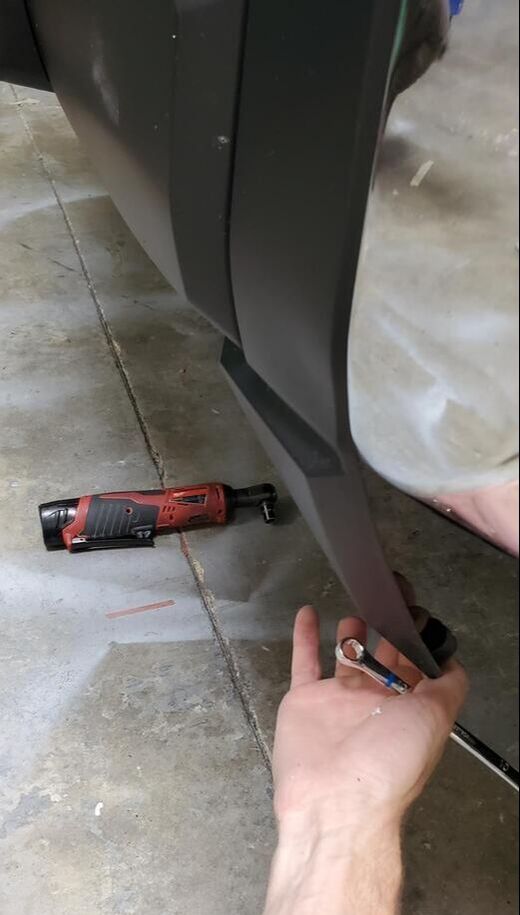
4. Begin removing the center valence trim beginning with the bottom bolt, and working your way up to the top. As you move to the higher bolt, you will need to pull the center valance away from the truck to give yourself access to those fasteners. A 10mm ratcheting wrench is highly recommended for these bolts as access is limited.
|
|
|
5. Collect and save all nuts and bolt related to the previous step.
Prepping the Bumper
Only perform these steps following your (dry-fit)
6. Clean your bumper thoroughly if not already done. Lastly, clean the surface where the 3M tape will be attaching near the center valance with isopropyl alcohol to remove any oil, or soap residue.
7. Wipe the surface of the bumper where the 3M tape will be attaching with the provided adhesion promoter cloth. A little goes a long way. Be sure the promoter has dried before attempting to attach the tape.
9. Lastly, ensure that the bumper and tape is warmed to at least 68 degrees F with a hair dryer or heat gun, if ambient temperature is cooler than that.
Installing Your BumperShellz
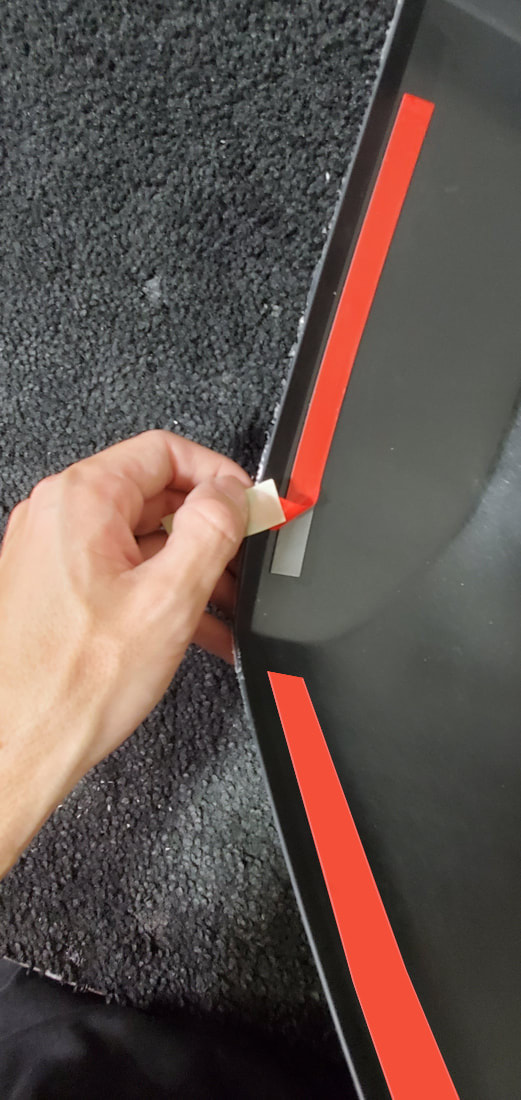
10. Peel back the first 1" to 1 1/2" of the red backing to the 3M tape on the two perimeter tape sections, beginning at the bottom. Wrap this edge around to the front side, and use masking tape to secure it for later access. This will make positioning the BumperShellz easier by minimizing the possibility of premature tape adhesion. Completely remove the backing to the 3m tape located on the outside of the fog lamp cut-out.
|
|
11. If your model comes with a protective film from the manufacturer, also peel this back about an inch to ensure it isn't trapped underneath the trim after your installation.
12. Begin installing your BumperShellz starting with the edge facing the wheel well. The top edge will slip under the body panel just above the bumper.
13. Continue tucking the top edge of the BumperShellz under the top body panel as you move toward the center.
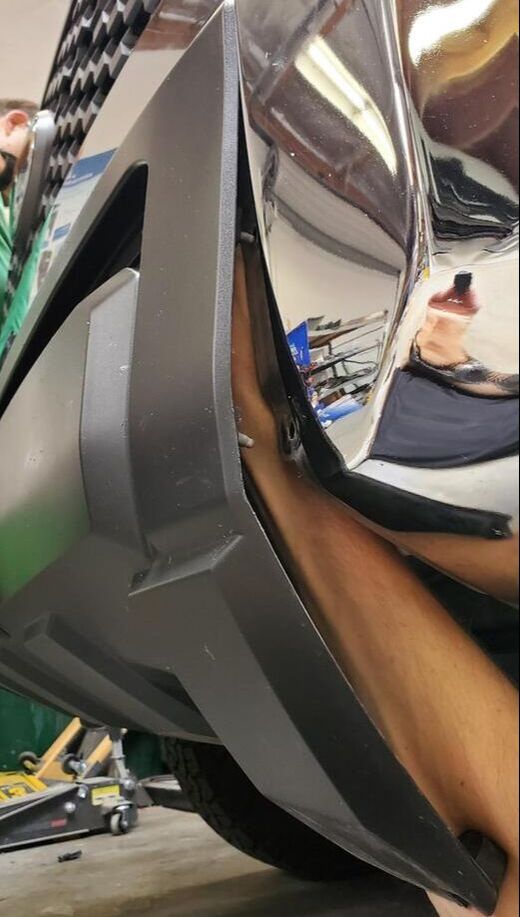
14. Once the inboard edge of your BumperShellz comes in contact with the center valance, begin tucking it underneath the gap in the valance you created by removing the inner bolts. Begin with the top edge. Use your trim tool, credit card or squeegee to pin the top edge of the BumperShellz against the back of the bumper. Then, while pulling out on the center valance, slip the top edge underneath the valance.
15. Continue to tuck the rest of the edge of the BumperShellz under that center valance from top to bottom until no edge is visible.
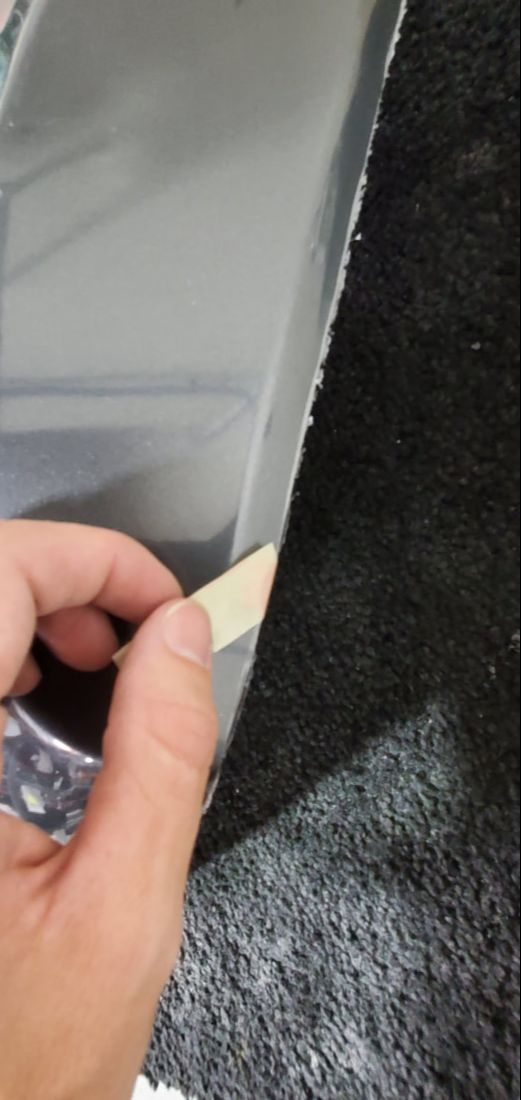
16. Now, shift the BumperShellz as far inboard as possible, making sure the maximum amount of edge is firmly overlapped by the center valance. You will want to keep this force on the BumperShellz as you remove the red backing to the 3M tape by utilizing the tab you secured previously to the front of the part. If you have sensors, while doing this, ensure the sensor clearance hole in the BumperShellz is properly positioned over its counterpart in the bumper.
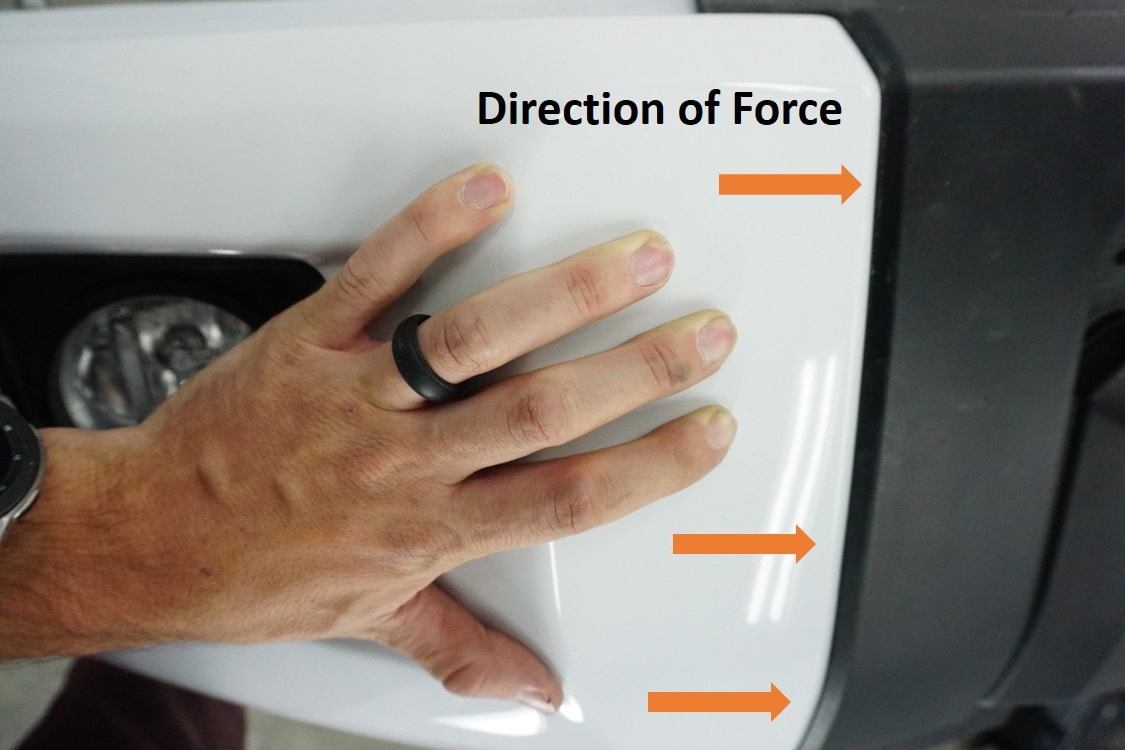
17. Put firm pressure on the 3M taped areas of the BumperShellz to complete the adhesion making sure the cover doesn't creep back outboard.
The Finale
18. If you have parking sensors, reinstall these now by pushing them back through the sensors clearance holes, and reattaching the harness. Replace the white spring clip to secure the sensors. (The white spring clips will create a minimal "dimple" on the front surface of the part as the clip pulls the sensor bezel tight against the bumper. This is normal, but sanding, or cutting the springs off of the white clips will eliminate this if you prefer.)
19. Begin re-securing the bolts and washer nuts to the center valance.
20. Return to the front underside of the bumper to reinstall the washer bolts on the vertical edge of the valance. Tighten these until they are snug, but be sure not to over-tighten. Over-tightening will slightly torque the BumperShellz, and force them out from underneath the valance and will result in a gap at the lower edge of the bumper.
21. Replace the fender liner, using the bolts, screws, and clips that were removed during the beginning stages of the preparation. The clips for the screws on the outside of the fender liner will sandwich the chrome tabs in the bumper and the tabs on the BumperShellz will remain on the outside of the black plastic clips.
22. Once again, put firm pressure on the taped areas of the BumperShellz, and remove any protective film.
Care for your BumperShellz™
Most BumperShellz colors will function much like paint. They can be buffed, polished, taken through automated car washes, and whatever else you would normally do. Some ABS colors can be sanded down and re-painted if ever you decide you want to change colors. The only color that cannot be polished, and re-painted is the Textured Black TPO.