Items Included |
Tools Required |
• Side Covers: 2
|
• Isopropyl Alcohol
|
Before You Get Started...

Warm surfaces and 3M tape with heat gun if ambient temperature is below 68 degrees F
|

Any Modification or unintended use will void the manufacturers warranty
|

A dry fit of all pieces must be performed before the final installation of the product to ensure fit
|

Products cannot be returned for a full refund after the red backing to the 3M tape is removed
|
Preparation
The degree to which you follow these preparation instructions will determine the quality of the installed product. Please follow all instructions, and be patient. If you are unsure of any area of the installation after reading these instructions, please call us at 844-918-3688, and we will answer any questions that you have.
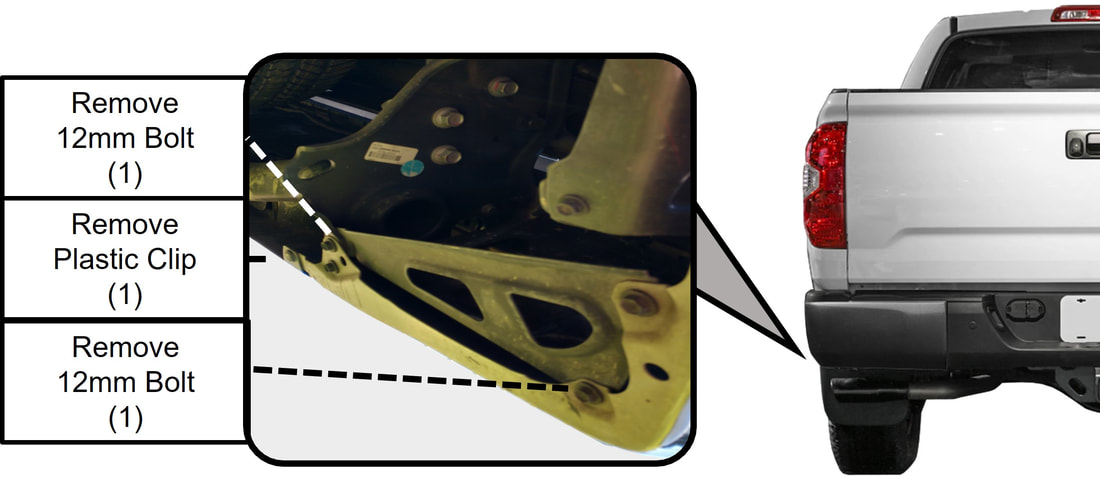
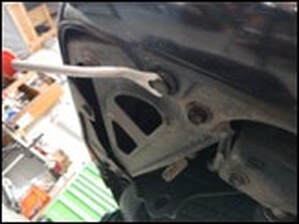
1. Remove indicated lower bolts bumper bolts and clips. ONLY REMOVE THE BOLTS INDICATED. Repeat on both sides.
FOR PLASTIC REAR BUMPERS ONLY
|
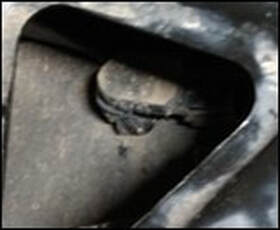
1a. Remove all black lower clips in addition to the bolts indicated above.
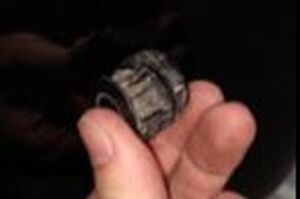
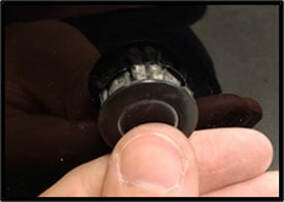
1b. Detach rear parking sensor from wiring clip. 1c. Remove parking sensor. This is best done by compressing the clips around the back side of the sensor and pushing the sensor outward. |
|
|
2. Perform a dry-fit of the product by following all installation instructions with the red backing to the 3M tape in-tact.
3. Clean the bumper surface thoroughly, and then wipe down with isopropyl rubbing alcohol. Remove the adhesion promoter cloth from the packet and use it to wipe the surfaces where the 3M tape will be touching down. (if installing in cooler weather, review Preparation Step #1)
4. Remove the red backing to the 3M tape
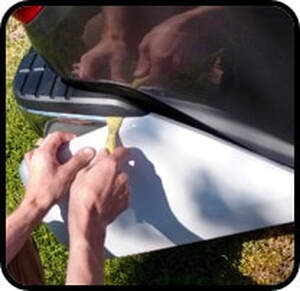
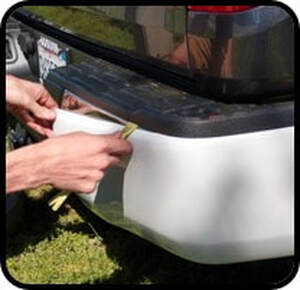
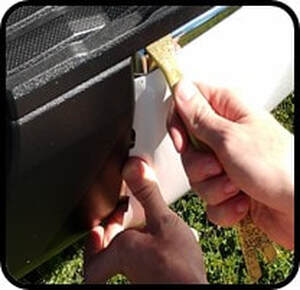
5. Use a plastic trim tool or credit card to lift slightly on the edge of the rear step pad. Slip the flange of the bumper cover under the step pad. After it is started, the cover should slip under the step pad around the rear of the bumper towards the license plate
|
|
|
6. Slip the inboard edge under the plastic center cover. Slide the cover upward until it is completely tucked under the step pad and center trim. Be careful not to let the tape firmly attach until you are completely satisfied with the position of the cover.
FOR PLASTIC REAR BUMPERS ONLY
|
6a. Align sensor cut-out with the sensor hole in the bumper
6b. Reinstall sensor by pushing the clip through the clearance hole. Press until flush. Hint. It is easiest to first reattach the sensor to the wiring clip through the sensor hole rather than performing this operation after the sensor is reinserted. |
|
|
7. Once you are fully satisfied with the position of the cover and ensure no chrome is visible, you can begin putting firm pressure on the taped areas of the cover.
8. Repeat process on opposite side.
9. Reinstall all clips, and hardware removed at the beginning of the process.
10. Wait 48 hours before taking your truck through a car wash or on highway driving.
Care for your BumperShellz™
Care for your BumperShellz™ like you would any fine paint finish. Use high quality cleaning products designed specifically for car care.
Gloss finishes: Oftentimes, minor scratches can be buffed out on the gloss finishes. Rubbing compounds can be used with a mechanical buffer, for deeper scratches.
Matte finishes are much more susceptible to abrasions, leaving a "glossy sheen" on the finish, which are generally permanent. Do not attempt to buff out scratches/abrasions on your matte finish, as this will generally make the damage worse. Avoid excessive friction when trying to remove anything stuck to the matte finish surface and keep cleaning rags/water clean and abrasive free. Abrasive brush-type car washes are not recommended, as they can abrade the Matte finish. Brushless car washes are acceptable.
Download Printable Installation Instructions
| tundra_rear_instructions.pdf |