Items Included• Grille Center Bar Overlay: 1
• Pre-installed 3M tape and Seal • Adhesion Promoter Packets: 2 |
Tools Required• Isopropyl Alcohol/clean cloth
|

Before You Get Started...

Warm surfaces and 3M tape with heat gun if ambient temperature is below 68 degrees F
|

Any Modification or unintended use will void the manufacturers warranty
|

A dry fit of all pieces must be performed before the final installation of the product to ensure fit
|

Products cannot be returned for a full refund after the red backing to the 3M tape is removed
|
Paint Preparation Instructions Link
If you ordered the "Paintable" version, click on the instructions link above for paint prep, and trim installation instructions.
Preparation
- The Shellz™ Grille Overlay is secured using the highest quality 3M Auto-Grade tape. The optimal temperature for installation is between 68°F and 100°F. If the ambient temperature is below 68°F, acclimate the overlay in-doors to room temperature and use a heat gun or hair dryer to warm the Original Equipment Grille surface immediately prior to installation.
- Ensure the grille surface is clean. After a thorough wash, use Isopropyl alcohol with a lint-free cloth to remove any remaining residue from the surface. For maximum adhesion, use included Adhesion Promoter 94 on the areas of the grille where tape will be applied.
- Dry fit all parts before removing red backing from 3M tape to check for fitment and practice the installation method before the attachment is permanent.
The degree to which you follow these preparation instructions will determine the quality of the installed product. Please follow all instructions, and be patient. If you are unsure of any area of the installation after reading these instructions, please call us at 844-918-3688, and we will answer any questions that you have.
Installation
NOTE: Dry-Fit all pieces to their specific locations BEFORE removing ANY of the red backing strips from the tape. Make sure all pieces are correct, i.e., you have received all pieces shown above, color/pattern is correct, and that all are undamaged. Dry Fitting is also good practice for lining up each piece and guiding it into place, visualizing how to do it when the backing strips are removed and the tape is STICKY. Note that once the backing is removed, we cannot give full credit for return.
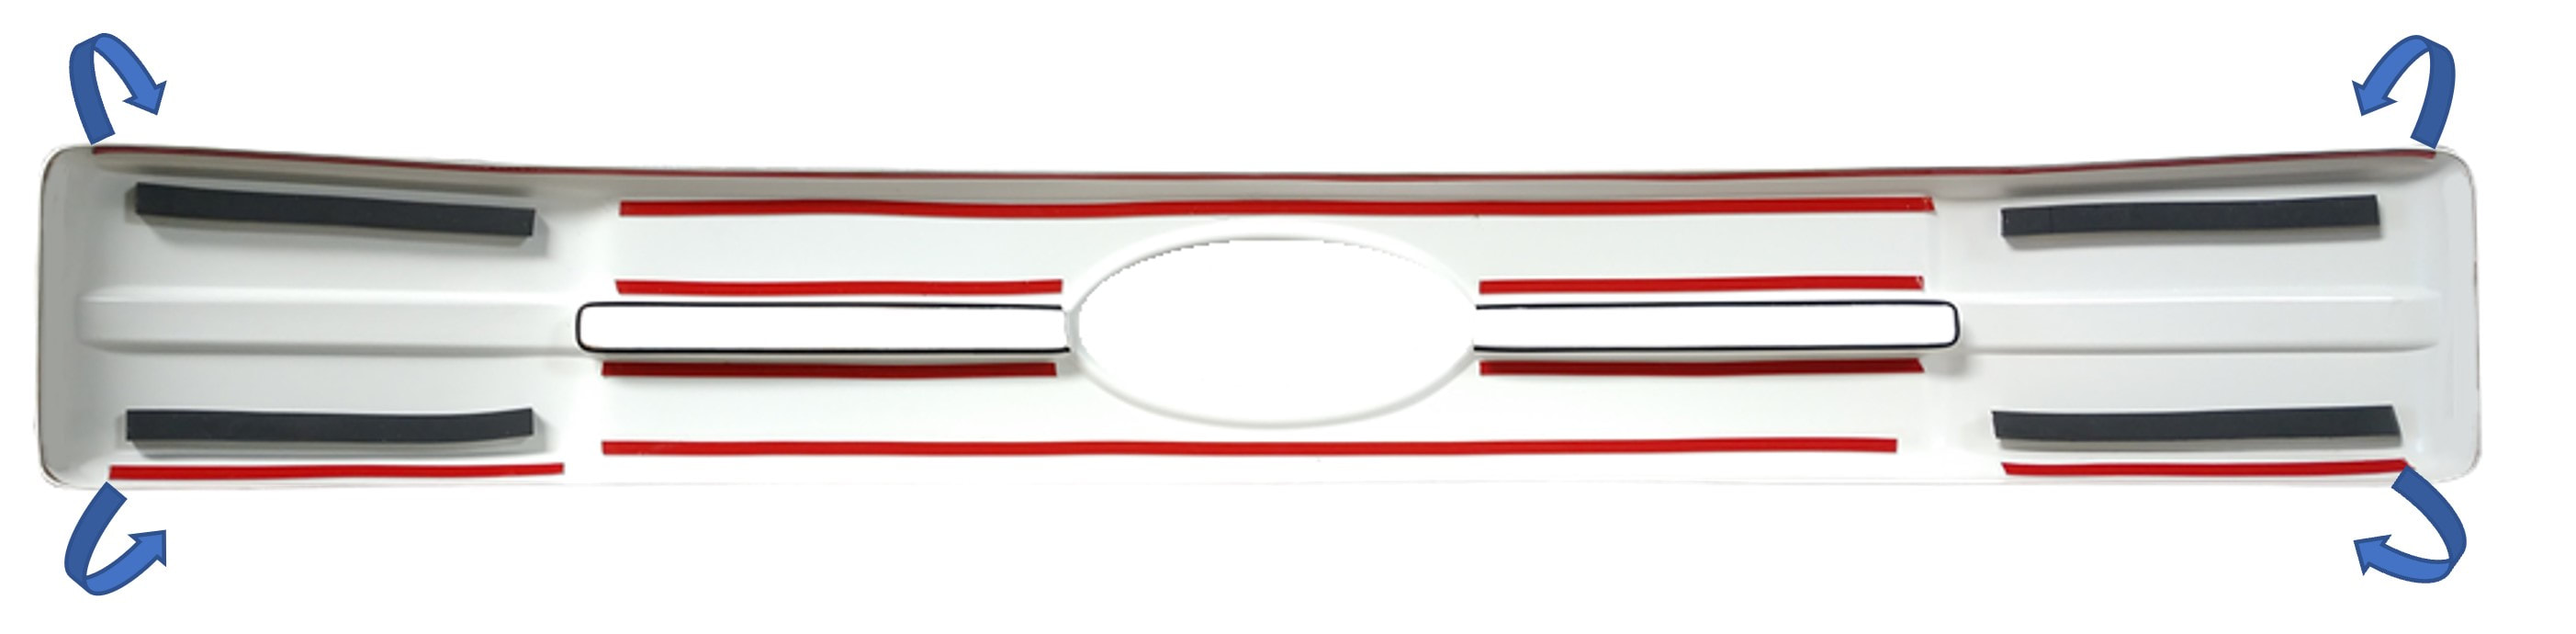
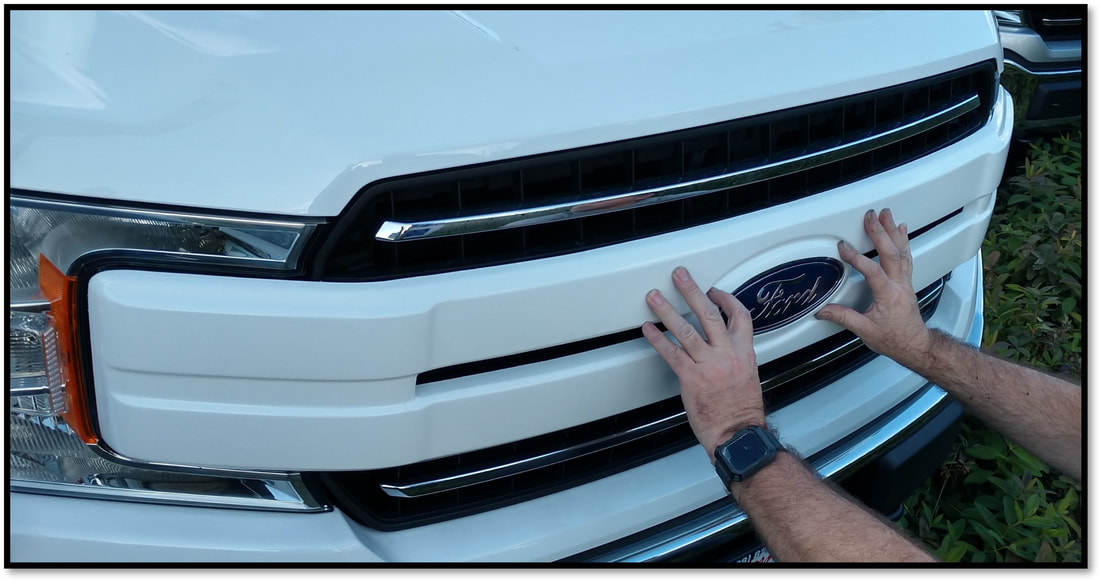
1. Dry fit the cover (do not remove tape backing) to practice the installation process before permanent installation. Make sure the overlay is the right way up. An indicator arrow on the back side of the overlay will show you which side is up. Use firm pressure to make sure the cover fully slides over the chrome center grille and the edges extend far enough to cover any exposed edges of the grille.
2. Clean the grille thoroughly as described in preparation section. Apply adhesion promoter to areas that will contact tape.
|
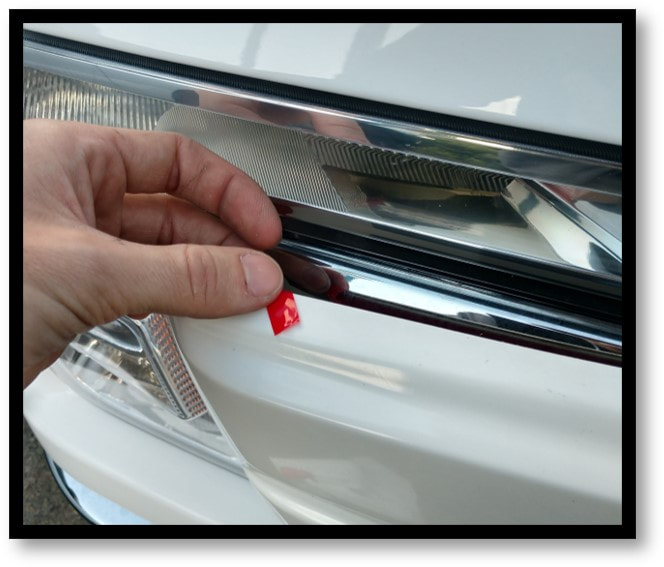
3. Peel back the first 1 inch of the red backing from the 3M tape on all perimeter tape sections, as pictured. You may wish to tape this backing to the front of the grille cover for easy access later. Completely remove red backing to all other inboard 3M tape, which will be inaccessible when the cover is flush with the grille. If installing on a Lariat, carefully also remove the foam strips around the air intakes. Otherwise, do not remove any of the other foam padding.
|
|
4. Align the top edge of the cover with the top edge of the grille, ensuring that all chrome is covered.
|
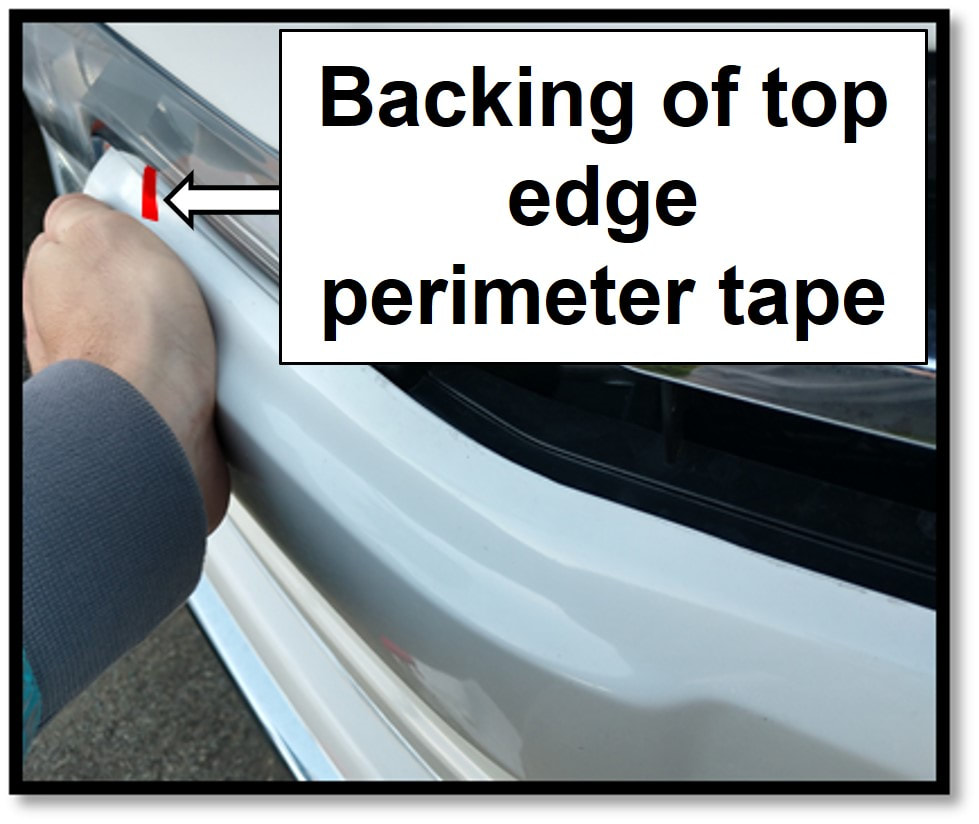
5. While keeping pressure on the cover to keep all chrome covered, begin removing the backing to the perimeter tape on the top edge of the cover by pulling on the section of red backing. As the backing is peeled off, put pressure on the newly exposed tape areas to adhere them to the grille surface. 2 people are preferable for this portion to ensure the cover does not shift during the process. Continue until all perimeter tape is adhered.
Note: For Lariat, top edge of overlay should be flexed to fit the slightly recessed top edge of that styled version of the grille. The tape will hold it in position. |
|
|
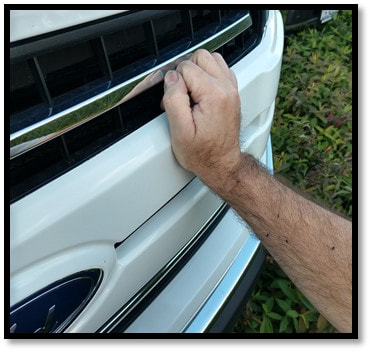
6. After the overlay is fully installed and all red backing is removed, put firm pressure on all areas where the 3M tape is touching the grille surface to ensure a permanent bond.
Note: Wait 48 hours before taking your truck through a car wash or on highway driving. 7. After 24 hours, again put pressure on all taped areas to ensure all of the tape surface is firmly attached.
|
|
Care for your Shellz™
Care for your Shellz™ like you would any fine paint finish. Use high quality cleaning products designed specifically for car care.
Gloss finishes: Oftentimes, minor scratches can be buffed out on the gloss finishes. Rubbing compounds can be used with a mechanical buffer, for deeper scratches.
Matte finishes are much more susceptible to abrasions, leaving a "glossy sheen" on the finish, which are generally permanent. Do not attempt to buff out scratches/abrasions on your matte finish, as this will generally make the damage worse. Avoid excessive friction when trying to remove anything stuck to the matte finish surface and keep cleaning rags/water clean and abrasive free. Abrasive brush-type car washes are not recommended, as they can abrade the Matte finish. Brushless car washes are acceptable.